

How I Built a Walnut Sofa Chair Table: A Functional, Elegant DIY Project
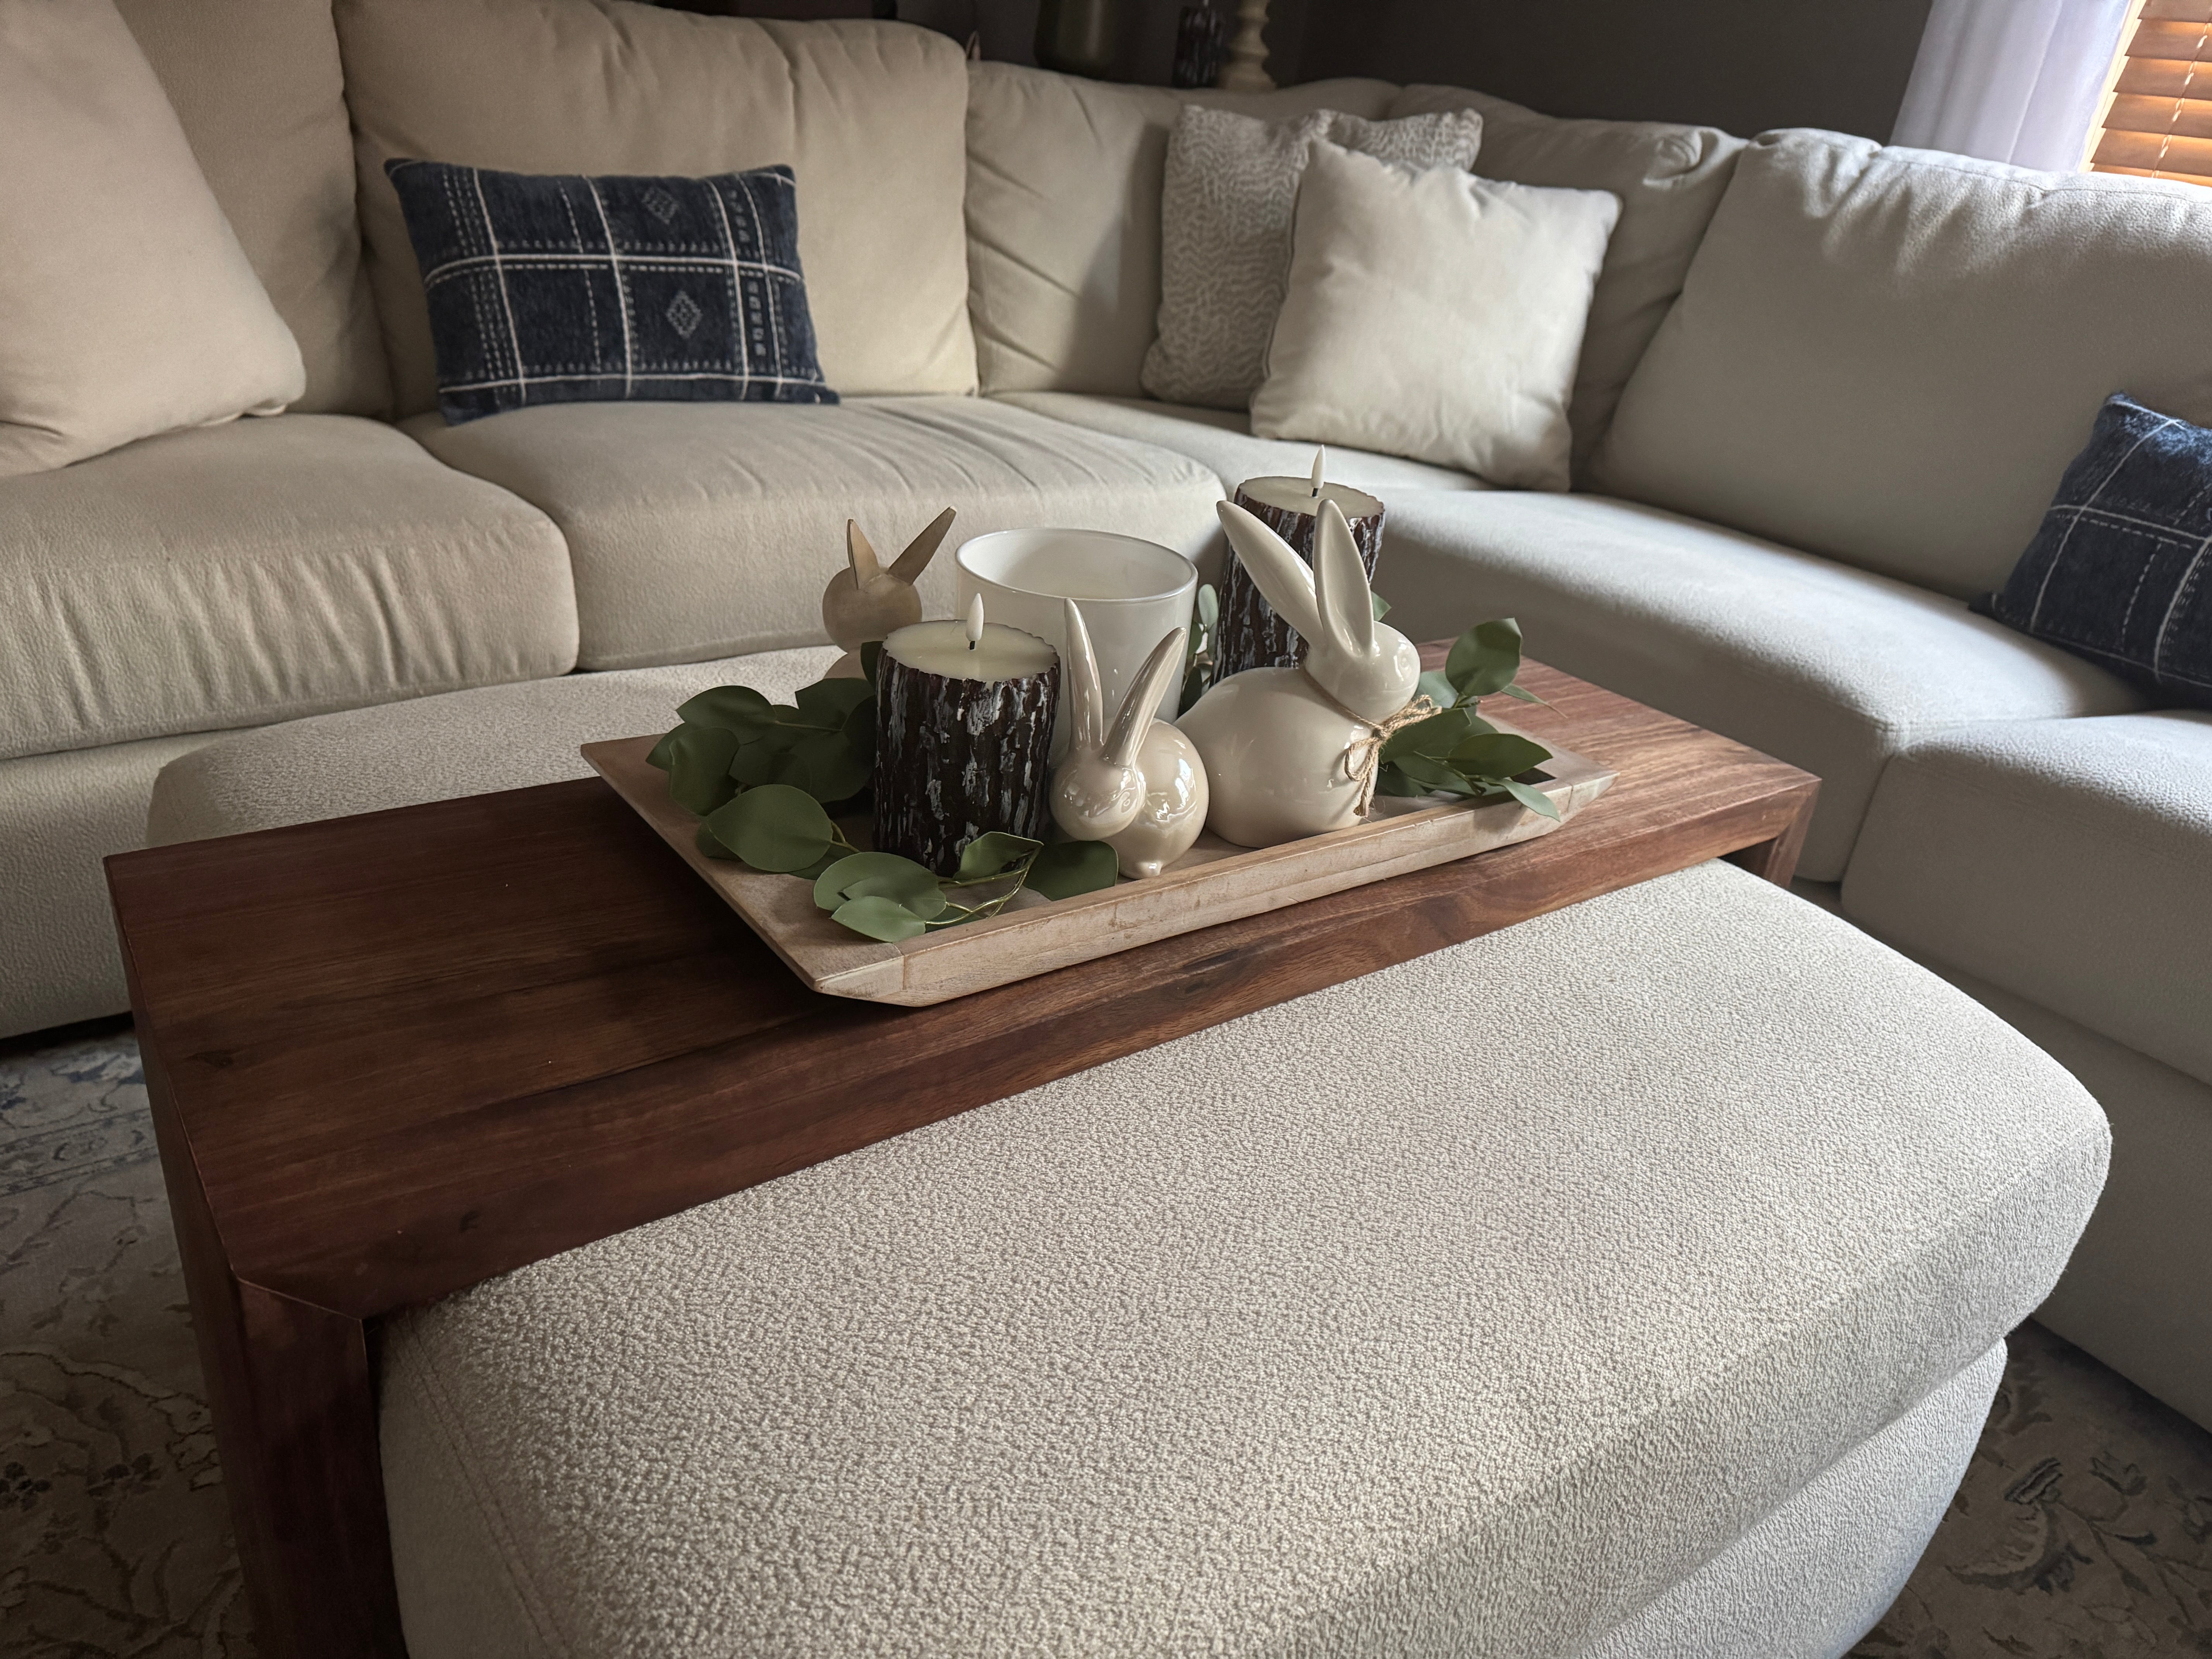
If you're like me and enjoy both woodworking and clever home solutions, you'll appreciate this walnut sofa chair table build. It's a compact, stylish piece that slides neatly under the arm of your couch—perfect for holding your coffee, book, or remote without taking up extra floor space. Here's how I created mine from a beautiful slab of walnut.
Why a Sofa Chair Table?
I’ve always loved multifunctional furniture, especially pieces that don’t clutter up the room. I needed something narrow enough to tuck beside my favorite reading chair but strong enough to support a drink and a book. A sofa chair table—also called a couch arm table or slide table—was the perfect solution.
Choosing the Wood: American Black Walnut
Walnut is one of my favorite hardwoods to work with. It’s strong, stable, and has rich, warm tones with beautiful grain variations. I picked up a rough walnut board from a local lumberyard, about 1 inch thick and 8 inches wide.
Pro tip: Let your walnut acclimate in your home workshop for a few days before working with it, especially if it's been stored in a different climate.
The Design: Simple, Clean, and Functional
The design is simple: a flat top with a vertical leg on each side. One leg tucks under the sofa, and the other supports the top beside the armrest.
Dimensions I used:
-
Top: 15” x 32”
-
Legs: 15” x 22” (height will depend on your sofa arm)
I wanted the piece to look like a waterfall—where the grain flows from the top down the sides—so I cut all parts from a single board.
Building the Table: Step-by-Step
1. Milling the Walnut
I started by jointing and planing the board until it was flat and square. Then I used the table saw to cut the pieces to final dimensions.
2. Miter Cuts for the Waterfall Edge
I used a 45° miter cut for the top and sides so the grain wraps continuously. This step is all about precision—any error here is noticeable.
3. Gluing the Miters
To get tight, seamless miters, I used painter’s tape to align the edges, folded the pieces together, and glued the inside corners. Clamping mitered edges can be tricky, so I used a band clamp and let it dry overnight.
4. Sanding and Finishing
Once the glue dried, I sanded everything smooth, starting at 120 grit and working up to 220. For the finish, I applied two coats of Rubio Monocoat Pure, which brought out the walnut’s natural beauty while offering durable protection.
Final Thoughts
This walnut sofa chair table has become one of the most-used pieces in my home. It’s practical, compact, and adds a touch of handcrafted elegance to my living room. If you’re looking for a weekend woodworking project with a big visual payoff, I highly recommend giving this one a try.
Tools I Used:
-
Jointer & Planer
-
Table Saw
-
Miter Saw
-
Orbital Sander
-
Wood Glue
-
Band Clamp
Materials:
-
Rough walnut board (at least 15” x 72”)
-
Wood glue
-
Finish (I used Rubio Monocoat Pure)
-
Sandpaper (120, 150, 220 grit)
If you decide to build your own version, I'd love to see how it turns out. Tag your photos with #walnutsofachairtable or leave a comment below. Happy woodworking!

Share: